Welcome to the Black&White Photo Gallery

Help With Selecting Options

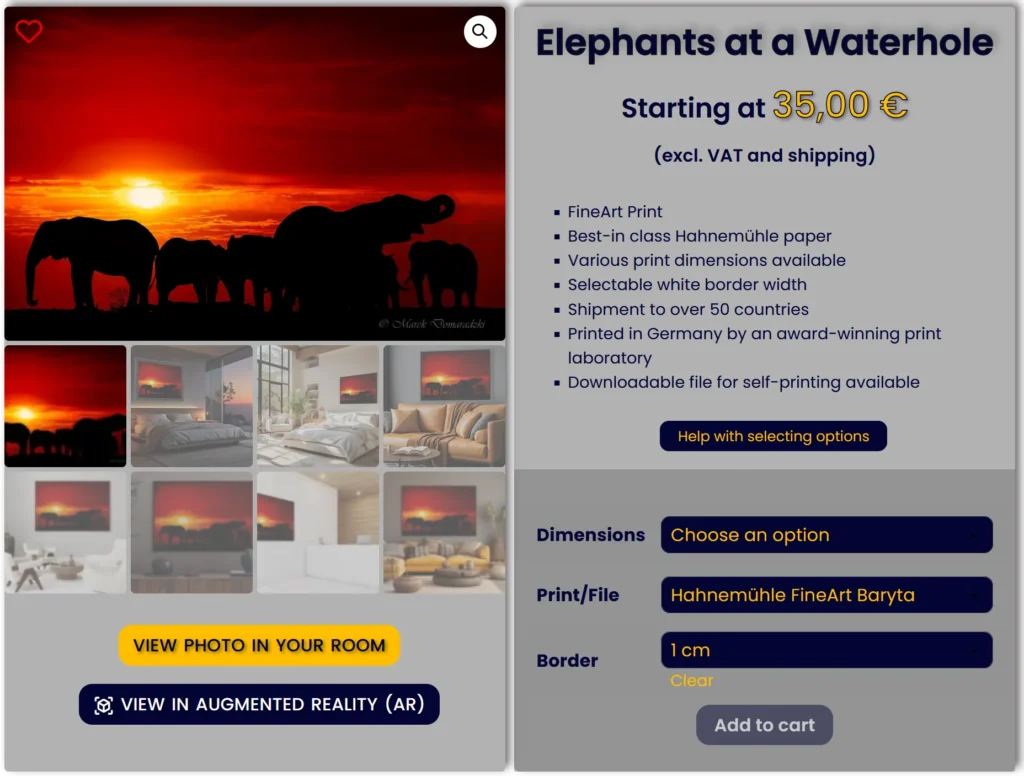
You need to select an option for each field (Dimensions, Print/File and Borders) to display the price and make the Add to Cart button active.

If you want to select a PRINT:

  • Dimensions – select one of the sizes in cm (not resolution).
  • Print/File – select Hahnemühle FineArt Baryta, which is selected by default (not Digital File 5400 x 3600 px).
  • Borders – select the width from 1 cm to 12 cm as required (don’t select No border as all prints come with default 1 cm white borders). The 1 cm border is selected by default. Please, note that for the print size of 150 x 100 cm you need to select 1 cm or 2 cm (as they are not available with wider borders).

Once the options have been selected as intructed above, you will see the external dimensions of the print including the selected wide borders, the net price (excluding VAT and shipping) and you will be able to add the print to the cart.

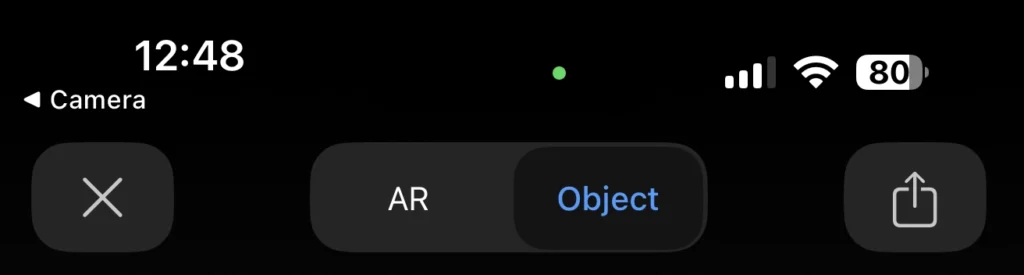
NOTE: You also need to have all the options selected and the price displayed to view the photo in the selected size in Augmented Reality (AR). If options are not selected, the size of the print displayed in Augmented Reality (AR) will be 150×100 cm, which may not be the size you want.

If you want to select a FILE:

  • Dimensions – select 5400 x 3600 px (not the size in cm).
  • Print/File – select Digital File – 5400 x 3600 px (not paper type).
  • White Borders – select No border (not the width of white borders as the photo file doesn’t have any white borders)

Once the options have been selected as intructed above, you will see the net price (excluding VAT) and you will be able to add the file to the cart.

If you get a message Sorry, no products matched your selection. Please choose a different combination., it means that you either haven’t selected the options as instructed above or the selected photo is not available in the selected dimensions.

Should you need more information, please see Prints or Contact us.

VIEW IN AUGMENTED REALITY (AR)

Try-Before-You-Buy

This is the second tool available on this website allowing you to view the selected photo  on your wall and is intended to help you see how the selected photo will match your interior, combine with your furniture and room colors.

VIEW IN AUGMENTED REALITY (AR) – available on product pages – allows you to superimpose the selected photo on your wall, in scale, in real time through your mobile device camera.

  • Click the View In Augmented Reality (AR) button displayed on each product page. If you are on mobile, the tool is launched automatically. If you are on desktop, you need to scan the QR code displayed on the monitor/screen using your mobile device.
  • Point the mobile device at the wall on which you what to display the selected photo and click AR on your mobile screen.
  • After a second or two you will see the selected photo on your wall.
  • You can move or change the size of the displayed photo.
  • If you “lose” the photo (see the blank wall), tap the screen to display the top icons. Tap Object, point your device at the wall again and then tap AR – the photo should be repositioned on your wall.
  • If you tap the download button, you will be able to send the model.usdz file by WhatsApp. Thus, when clicked, another person will see the photo you viewed in AR in his/her interior (the mobile device must support AR functionality).

VIEW THE PHOTO IN YOUR ROOM

Try-Before-You-Buy

To use the tool, you don’t need to read the following information/instructions. You can just launch the tool wherever you see it available on this website and follow the on-screen prompts. If you, however, would like to know how the tool works before-hand and how to get the most of it, I recommend reading the following information. Anyway, you can always come back to this page if it turns out you need some help or additional information.

This feature allows you to view the selected photo  on your wall  and is intended to help you make up your mind which photo will match your interior, combine with your furniture and  room colors, in what size and give you some idea about framing style you may like.

The VIEW PHOTO IN YOUR ROOM tool is accessible from each Product page.

Although you can use this tool on your mobile device, due to a much better viewing experience, we highly recommend using it on your desktop/laptop.

Step-by-Step Instructions & Useful Hints

Take a Picture of Your Room
& Launch the Tool

  • You need to take a picture of your room. The print will be visualized on your wall in scale and perspective.
  • Save this picture on your computer as you will need to upload it.
    Important notice: We don’t see this picture and it’s not saved anywhere on our site. Your privacy is fully protected.
  • Go to Shop.
  • Select a photo clicking View options.
  • On the displayed Product (Photo) page (see an example on the right), click the button VIEW PHOTO IN YOUR ROOM located below the photo (highlighted in yellow on the right).
    You don’t need to select any photo dimensions at this point. The size will be adjusted by you later when you see the photo on your wall.

Upload the Picture of Your Room

  • In the popup window Preview Artwork in Space, click UPLOAD IMAGE.
  • Your Explorer/Finder widow will open up. Select the picture of your room and click OK.
  • Wait a few seconds until it gets uploaded (you will see a small thumbnail of your uploaded picture) and then click the red SAVE AND CONTINUE button.

Uploaded Picture of Your Room

  • You can click on the dimmed picture of your room to proceed to setting up the area within which you will position the photo or can choose to see a visual demonstration how to set up the area.

Visual Demonstration How to Mark the Wall Area

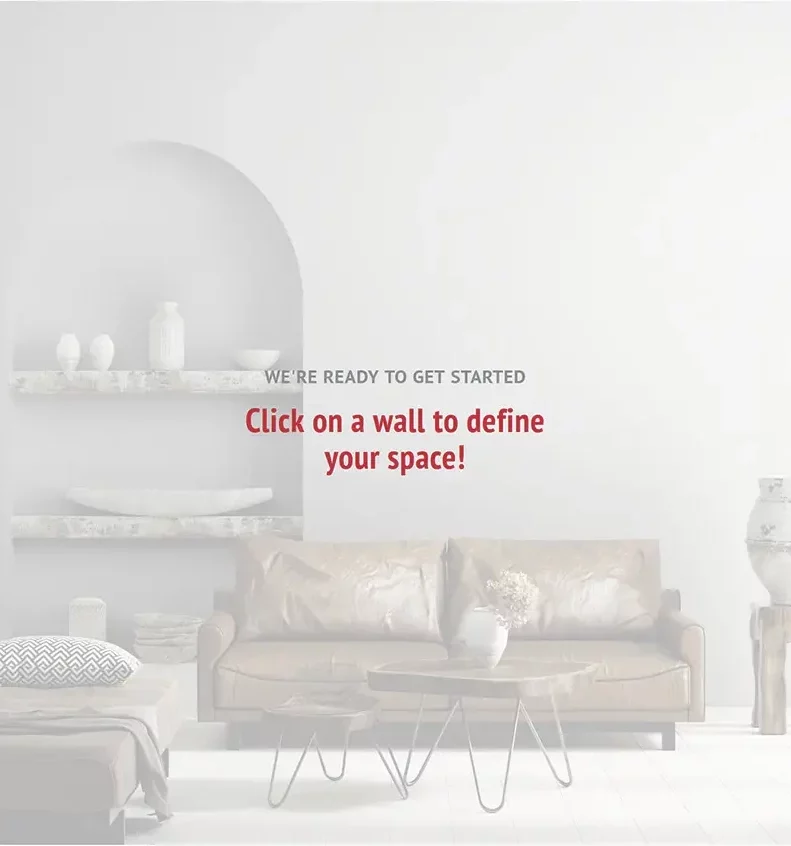
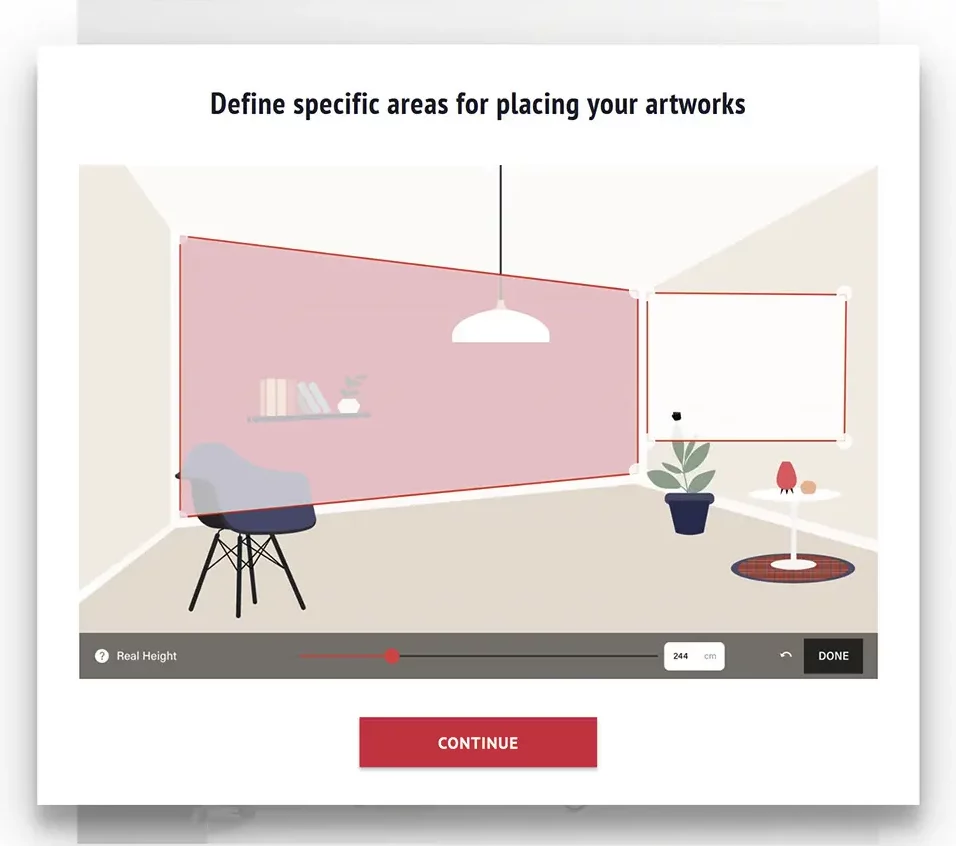
  • If you click on Help in the top right-hand corner of the screen, you will display a visual demonstration how to mark the area on your wall within which you will position and visualize your photo.

    Please, note that the visual demontration (Help) can’t be launched from the slideshow level.

  • When watching the tutorial, please notice that if the walls in your uploaded room picture are shown in perspective, you have to mark the area accordingly.

  • Click the CONTINUE button to proceed.

Setting Up the Wall Area

  • You will see a white rectangular area superimposed over your wall.

    This is the area within which you will be able to virtually hang your photo.

    You need to adjust the size of that white area.

    Hint: We recommend marking a much bigger area than the photo itself as it will give you more flexibility with positioning and sizing of your photo or will allow you to place more photos side by side.

    Hint: Your photo will always be positioned parallel to the sides of the white area. If you don’t have walls in perspective, don’t move the bigger corner/round handles.

  • Drag the top/bottom middle (smaller) square handles to adjust the height of the area.
  • Drag the left/right middle (smaller) square handles to adjust the width of the area.

    You can click on the white area and reposition it on the wall.

Height of the Marked Area

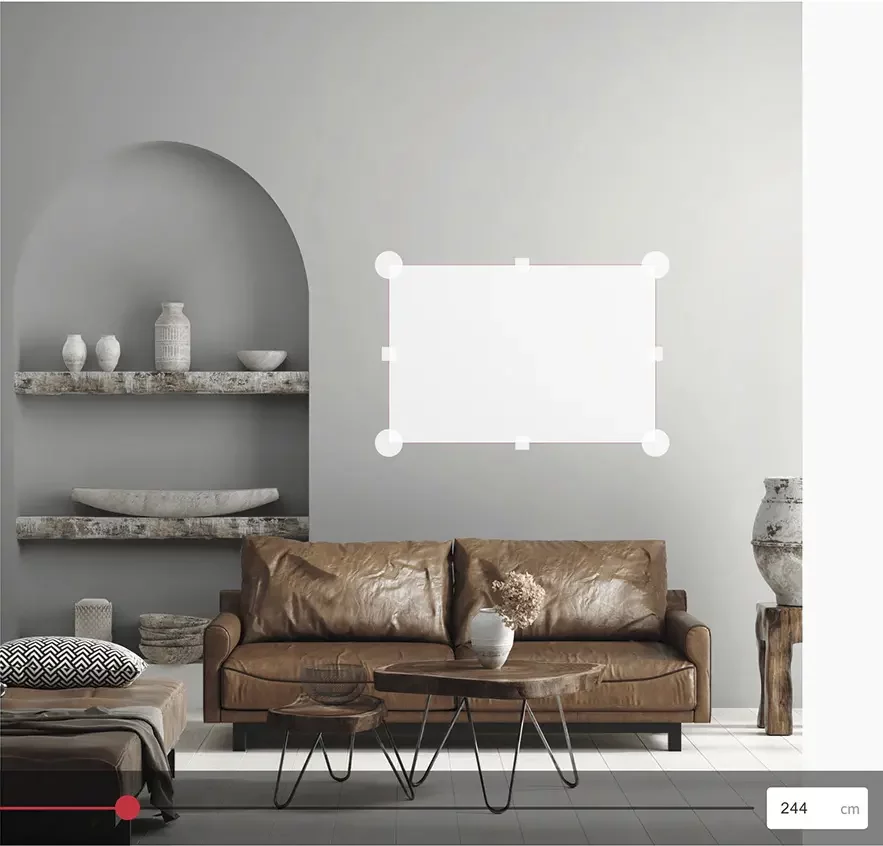
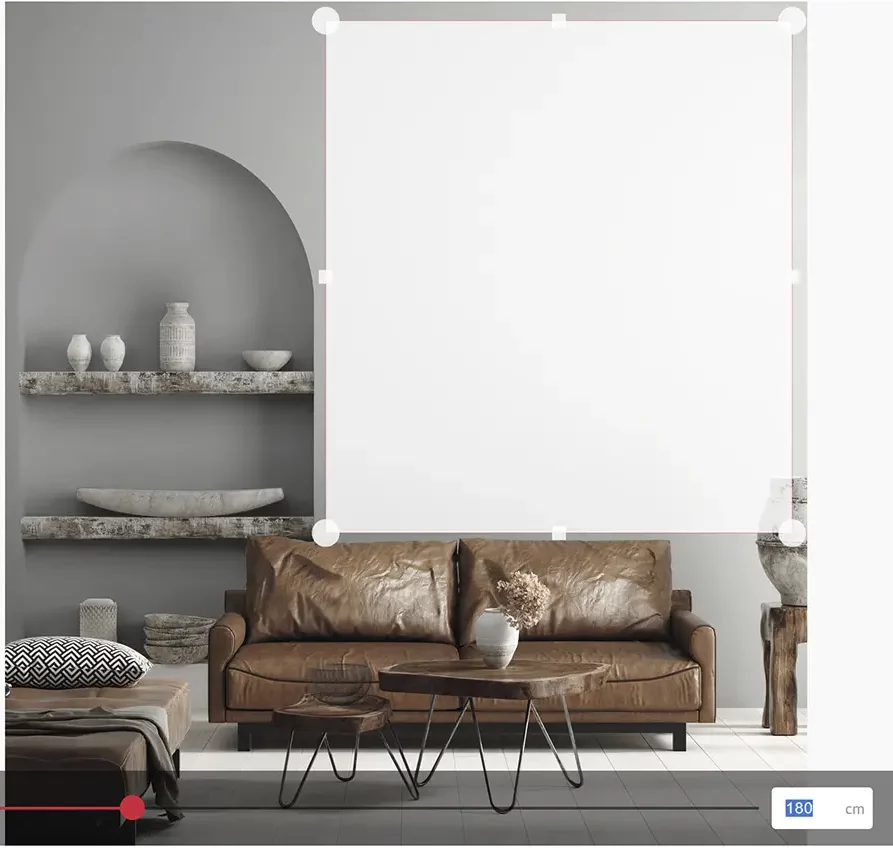
  • Enter the real height of the area you have adjusted (not of the wall) in cm or drag the slider at the bottom of the screen until you get the correct height.

    Please, note that the more accurately you provide the height, the more accurately the photo will be displayed in scale relative to the real dimensions of your interior.

  • Click the red DONE button.

  • Click the red SAVE AND CONTINUE button.
  • You will finally see the photo on your wall in scale (and perspective).

Adjust the Size of the Photo

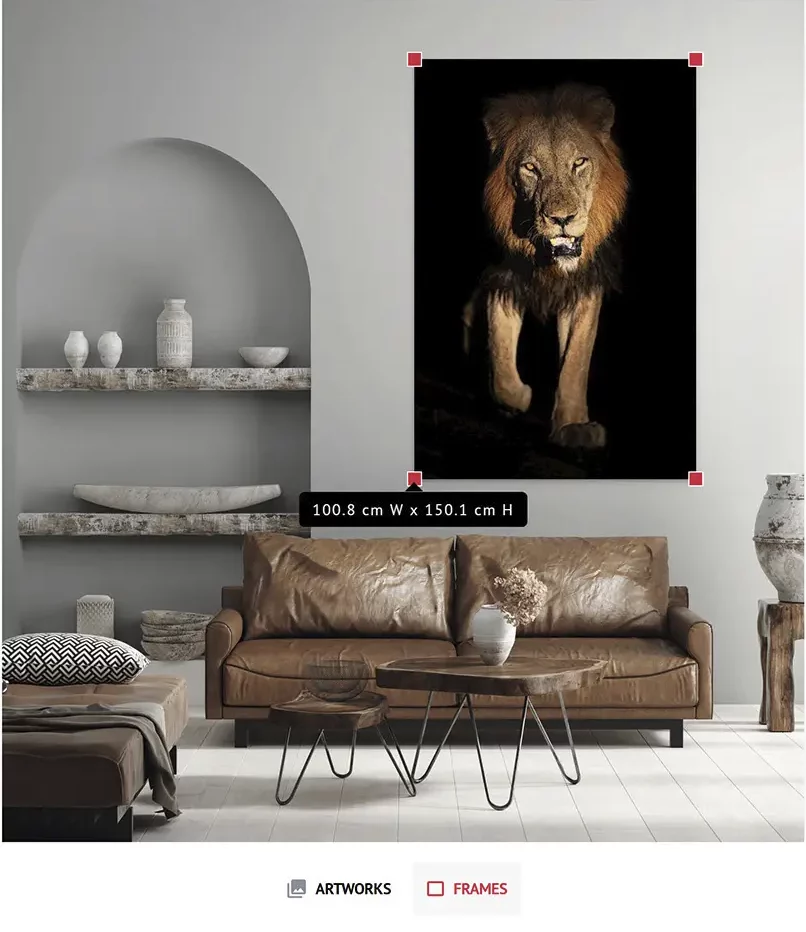
  • Drag the red corners to adjust the size of the photo.

    Hint: If you first hover the mouse cursor over one of the red handles until the photo size is displayed and then start dragging the handle, you will see the changing dimensions while resizing the photo.

    When adjusting the size, please bear in mind the standard sizes in which a given photo is available. You can display the adjusted photo size by hovering the mouse cursor over one of the red handles.

    You can reposition the photo on you wall within the area you have marked previously.

  • If you hover the mouse cursor over the red handle, you will see the size of the photo in scale.

Framing Style

  • Click the FRAMES button at the bottom of the screen to display the window with available frames. Click it again to close it.
  • Select a frame in the window displayed on the right side of the screen.
  • You can also search the frames by entering their name in the Search box.

    Important notice: As of now, we offer only unframed prints. The framing tool is solely intended as an aid to visualize how the specific framing style will go together with the photo and your interior and to give you some idea what framing you may like and request when you have your photo framed.

  • When you are done, you can click the DOWNLOAD button to download the picture of your room with the (framed) photo on your wall.

Select a Different Photo or Place More Photos Side by Side

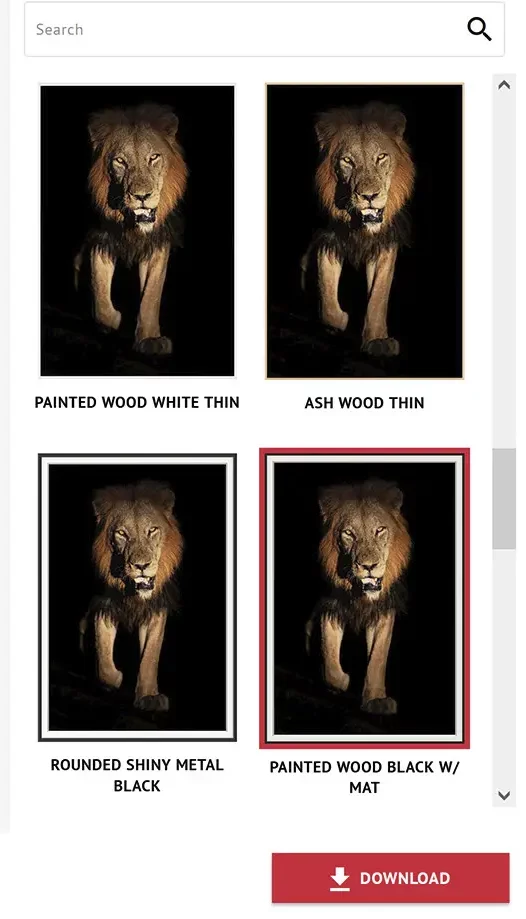
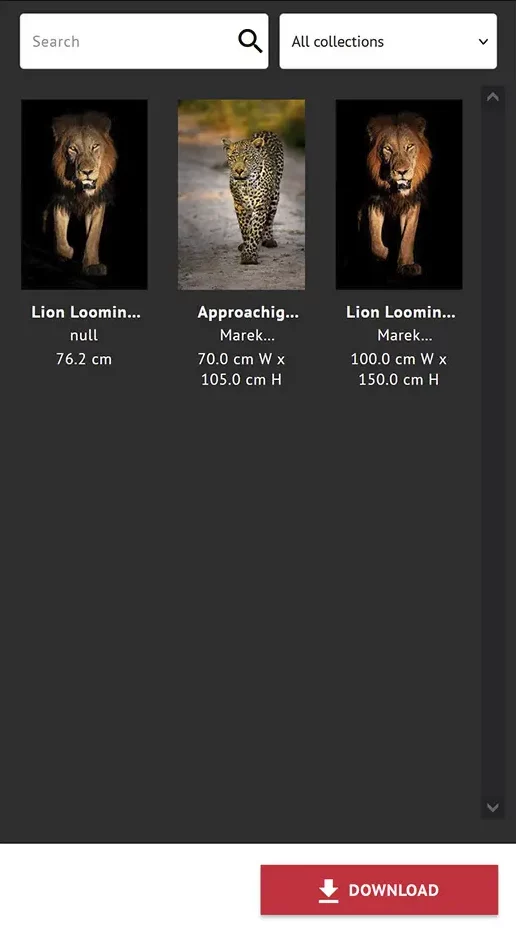
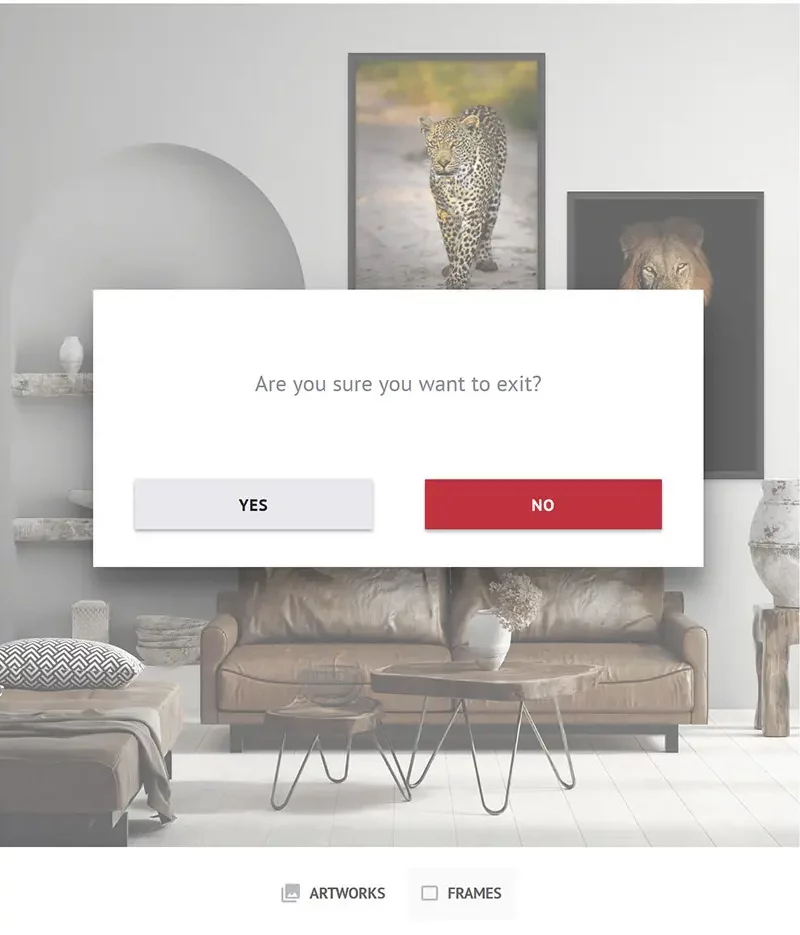
  • Click the ARTWORK button at the bottom of the screen to display the window with other photos. Click it again to close it.

  • If you want to change the photo, click the current photo (you will see the red handles) and the Delete key on your keyboard to make room for a different photo or drag the current photo out of the wall area.

  • Drag a new photo from the window on the right into the wall area, Adjust its size and select a frame.
  • If you want to see more photos side by side, drag another photo from the window on the right onto your wall and place it side by side.
    Please, note that your wall area may be a limitation and you may need to reduce the size of some photos to make them fit into the wall area.
  • You can search photos by name typing it in the Search box and/or select photos from different galleries using a drop-down list.

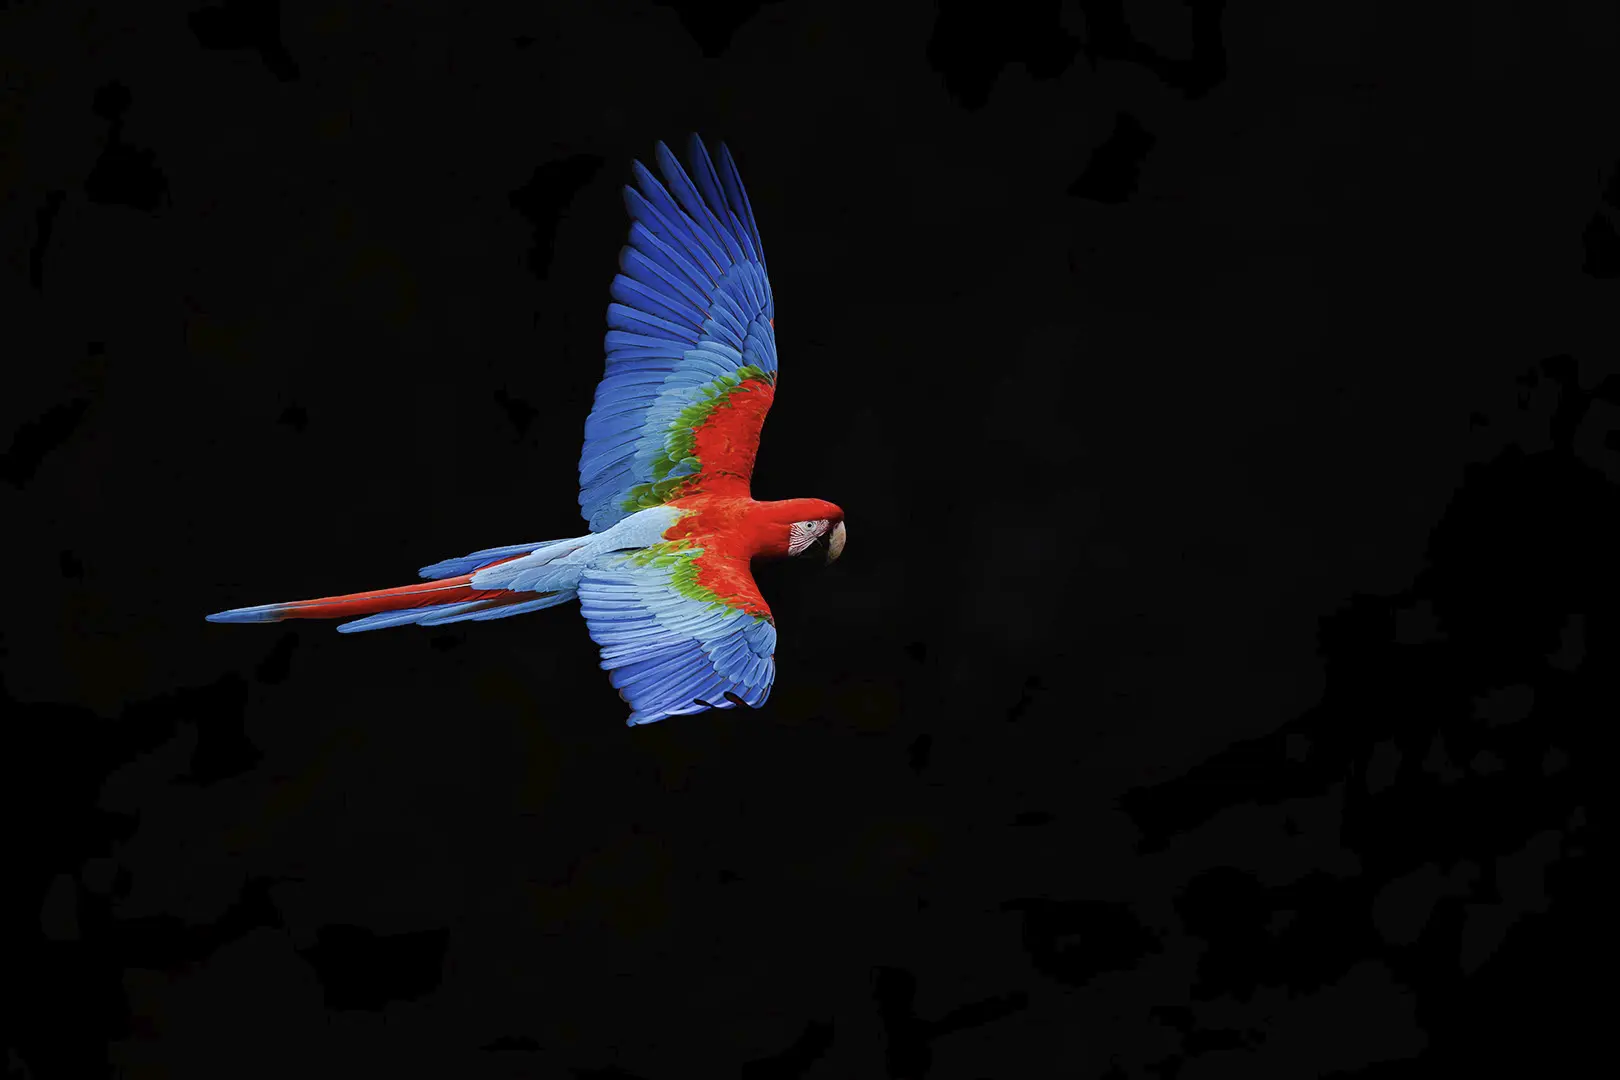
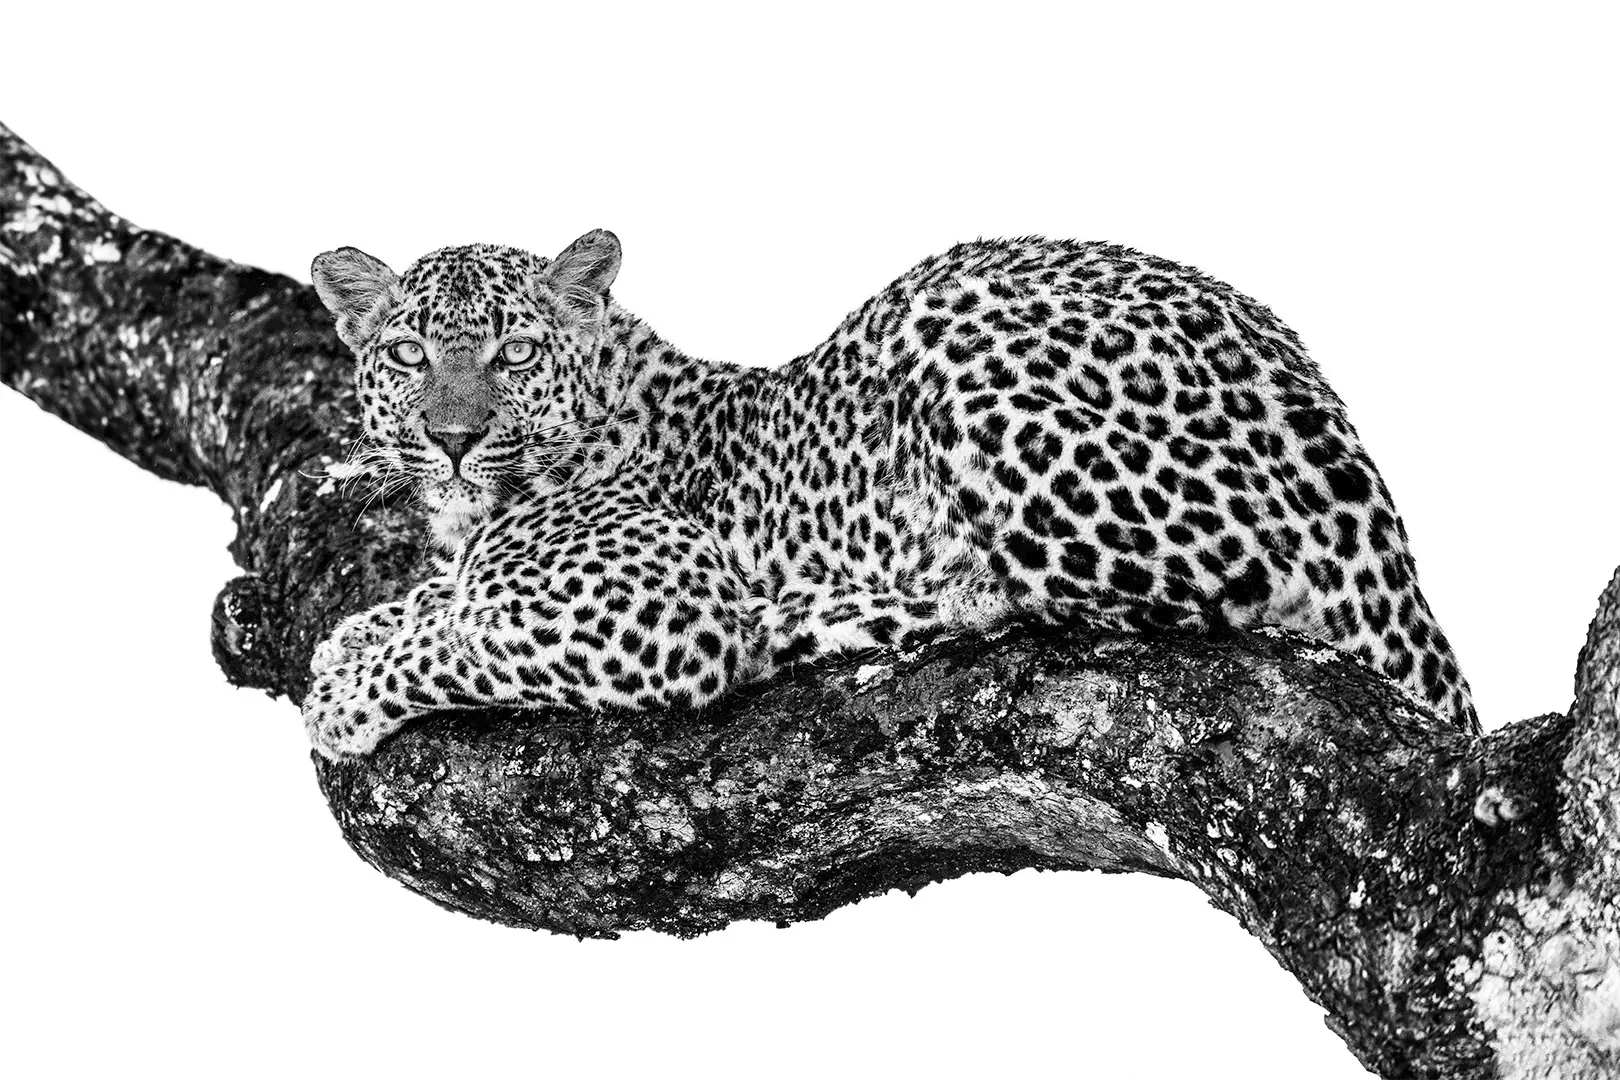
    Hint: Artworks are simply the photos you can also see on the Galleries and Shop pages and in the Virtual Exhibitions. They are categorized into galleries in the exactly same way.

Download & Exit

  • You can DOWNLOAD as many photo configurations as you want and save them to your computer. Just click the DOWNLOAD button.
    You can show them to your friends or family to seek their opinion as to your choice(s).
    You can also show your selection of the framing style to your framer.
  • If you want to exit the tool, click the close icon in the top right-hand corner of the screen. You will be reverted back to the Product page from which you launched the VIEW PHOTO IN YOUR ROOM tool.
golden hour
daylight
night
high key
low key
black & white
golden hour
daylight
night
high key
low key
black & white
golden hour
daylight
night
high key
low key
black & white

Stay Informed!

Subscribe for updates and exclusive offers.

*Your information has been submitted successfully.

There was an error submitting your information.

Stay Updated!

Subscribe for updates
Many new photos are coming soon

*Your information has been submitted successfully.

There was an error submitting your information.

Stay Updated!

Subscribe for updates
Many new photos are coming soon

*Your information has been submitted successfully.

There was an error submitting your information.